Are you considering doing Facebook ads for your business? Facebook is a great platform to use to get the word out about your business or service and running ad campaigns is one option that can be very effective if done right.
Even if you aren’t quite ready to start your ads the first thing I would suggest you do is install the FB Pixel onto your website. Basically the way the pixel works is that it is a piece of code that you will need to install into the header of your website so that Facebook can start tracking people who visit your website. It may sound a little complicated if you aren’t real familiar with how to handle code on your website but no worries in this post I’m going to show you a quick and easy way to get things all set up and ready to go.
Get Your Pixel Code
First thing you will need to do is go into your Facebook account and go to your Ads manager. Go to tools then events manager and then click on Pixels.

Next you will want to create a new pixel by clicking on “create new data source”. You will need to name it and then click continue and that will take you to a page with different options to install the code. You will want to choose “install the code” and Facebook will then provide the code for you to use on your website.
![]()
Installing Facebook Pixel in WordPress
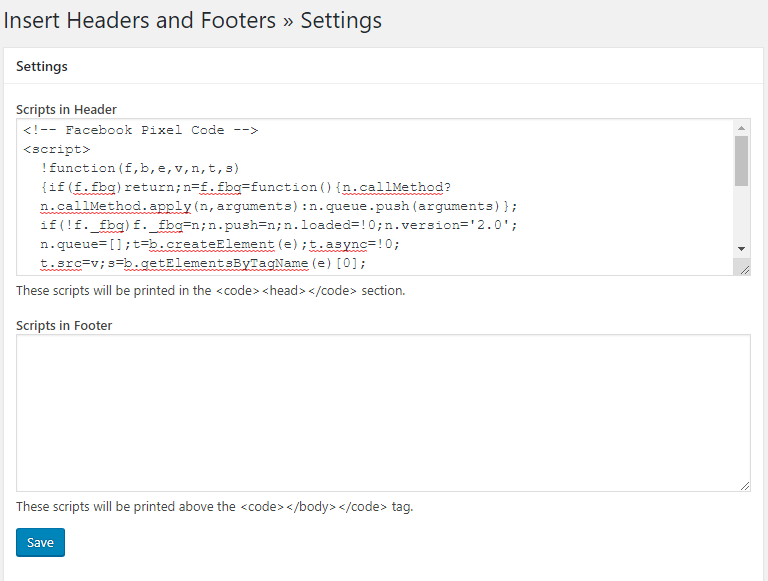
The next step will be to add the Facebook Pixel code just before the </head> in your WordPress theme. The easiest way to do this is to use the “Insert Headers and Footers plugin”
https://wordpress.org/plugins/insert-headers-and-footers/
After installing and then activating the plugin, you will need to go to the Settings » Insert Headers and Footers page and paste the code you got from Facebook into the Header section.
That’s it, you have now successfully installed Facebook Pixel on your WordPress website.
Verify it is installed correctly
To make sure you installed the pixel correctly you can use the chrome extension Facebook Pixel Helper. You will need to install this in your chrome browser and then check to make sure the pixel is installed.
![]()
Next Step: Create your Custom Audiences Using your Facebook Pixel
Now that your Pixel is installed on your website the next step would be to create a custom audience for your retargeting campaigns that you will be doing with Facebook ads.
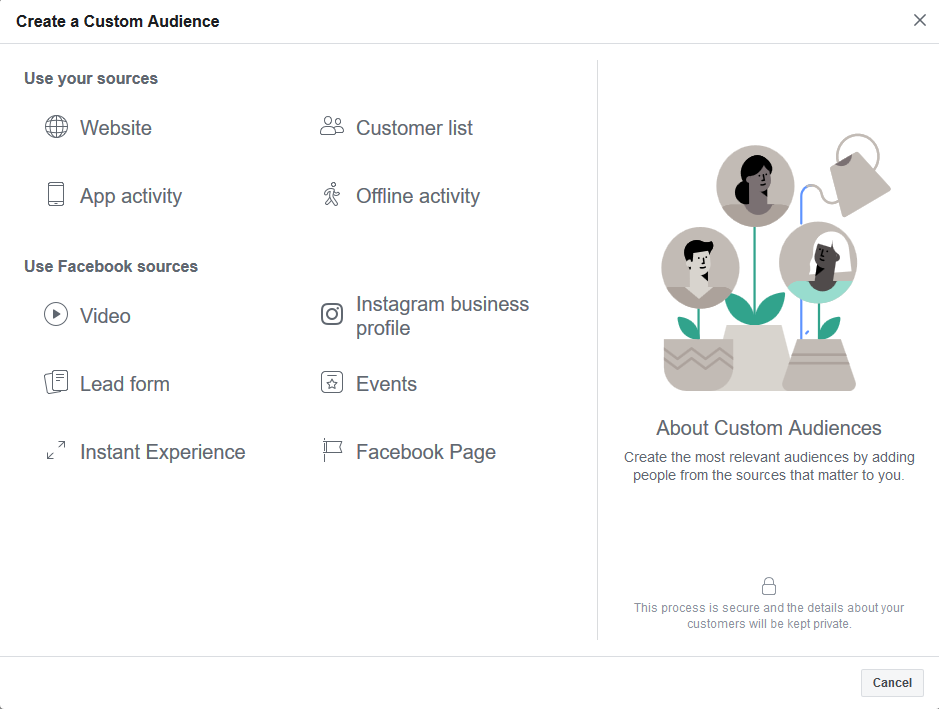
Custom Audiences allow you to target users you already know for your Facebook ads for example recent website visitors, people who have liked your FB Page, people who have signed up for your email list, etc.
To set this up go to your Facebook Ads Manager dashboard then to Tools » Audiences section.
This will show a popup where you will need to choose the type of audience you want to target on Facebook with your retargeting ads. It will also give you more options and settings to create custom combinations of the type of people you want this audience to target.
Then you will need to choose a duration in number of days. Lastly, you need to name the audience. Use something that helps you easily identify this audience in your insights.
Once you are done, click on the create audience button to finish creating your first custom audience.
Repeat the process to create more custom audiences for other Facebook retargeting campaigns.
Now you are ready to start running some ads. You can run different kind of ads for different objectives and when you go through the set up process for the ad it will give you the option to choose your custom audience.
I hope this article was helpful to you, leave a comment if you have any questions or need any more guidance on getting this set up correctly.